Hello, I’m Cynthia aka Frugal Gal! I’m into healthy living, wellness, milling whole grains, sourdough, fermenting & cooking from scratch. I’m happiest in my kitchen doing projects/experiments, especially if it involves using my gadgets. I love to share tips to save money & reduce waste. My countertops are always full of jars of fermenting kombucha, kefir, vinegar, sourdough etc.
I started this blog because I love sharing my projects with family and friends. I always thought it was the dream to be able to make a living doing something you love and have wanted to start a blog. It’s a great excuse to try new projects and connect with others! I’m trying my hand at affiliate marketing to showcase the products that I love. As an Amazon Associate, if you purchase something I recommend I may earn a small amount from qualifying purchases.
My blog will mainly cover the following:
Use what you have: How to make the most of your existing kitchen equipment, utensils, and pantry items. How to improvise, substitute, and repurpose things you already have at home.
Save what you can: How to reduce food waste, repurpose kitchen scraps and preserve food
Make what you need: How to make your own kitchen essentials, such as sourdough, yogurt, kefir, cheese, kombucha, chocolate, Lara bars, seasonings, dressings, mayo, cleaning products and more.
Tutorials and videos: I’ll show my most used kitchen appliances and how they can be used in various projects and if they are worth the purchase
I am new to creating videos and content and will be sharing mainly through Youtube and Pinterest linked through my blog posts. I am learning how to edit videos and create content so please feel free to offer feedback and comment if there are any topics you want to see me cover!
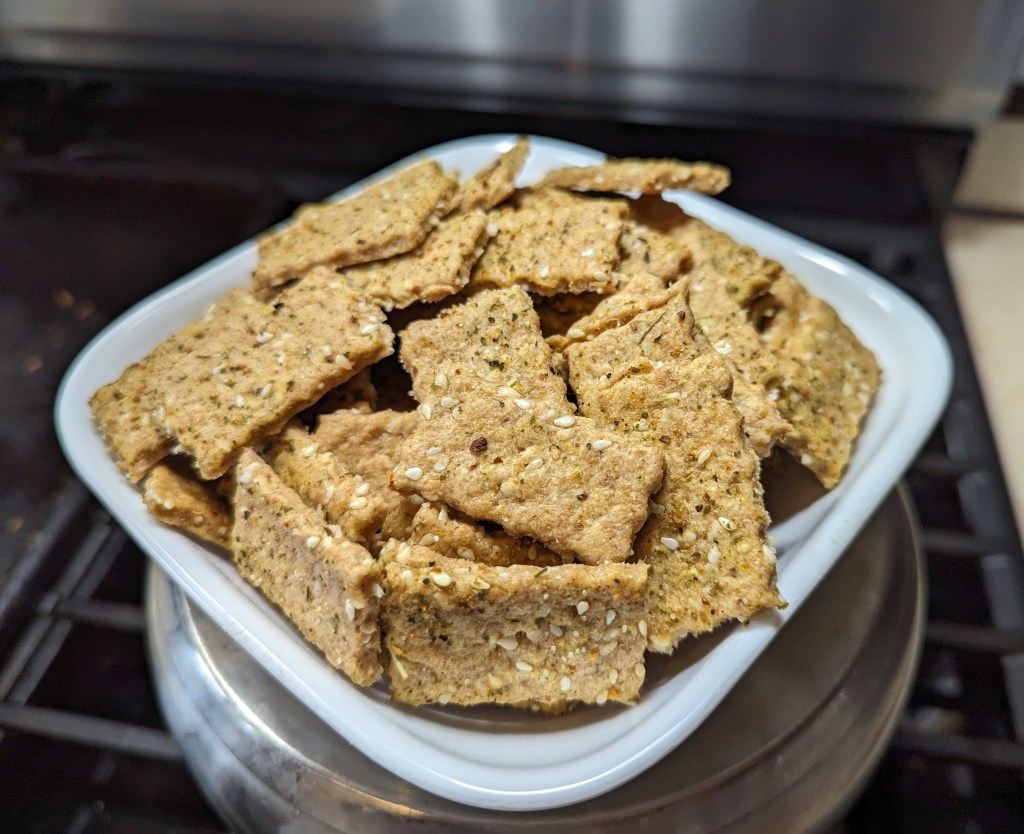
Lately I have been obsessed with making sourdough discard crackers! Today I had some specific ingredients I wanted to use up. I really love the cheesy cracker recipe that I used for my goldfish crackers but I wanted to try using up some soft goat cheese I’ve had in the fridge.
I decided to try using AI to come up with a new recipe to use up my desired ingredients. I have to say I’m pretty happy with it. I did ask it to rewrite the recipe a few times in order to incorporate more of the ingredients I wanted and it did a great job. I got a nice base recipe and then made modifications according to what I wanted to add. The crackers turned out delicious and I will definitely be saving this recipe to make again!
I used fresh milled spelt flour and my spelt sourdough discard for this recipe, however, you could use whatever flour you choose with your discard.
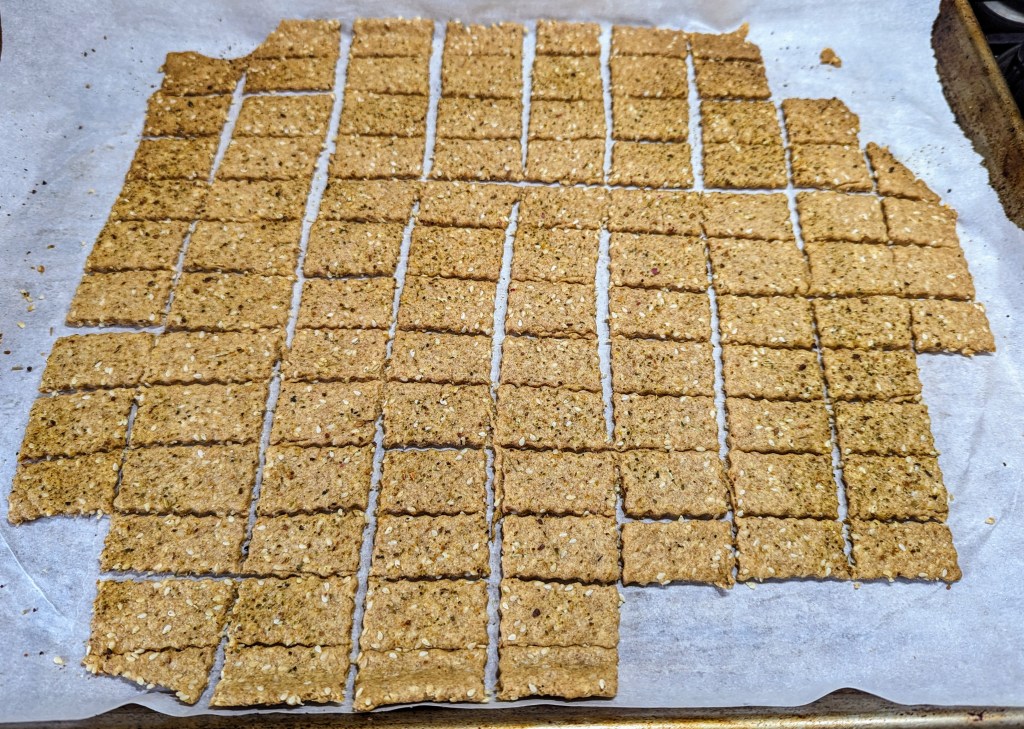
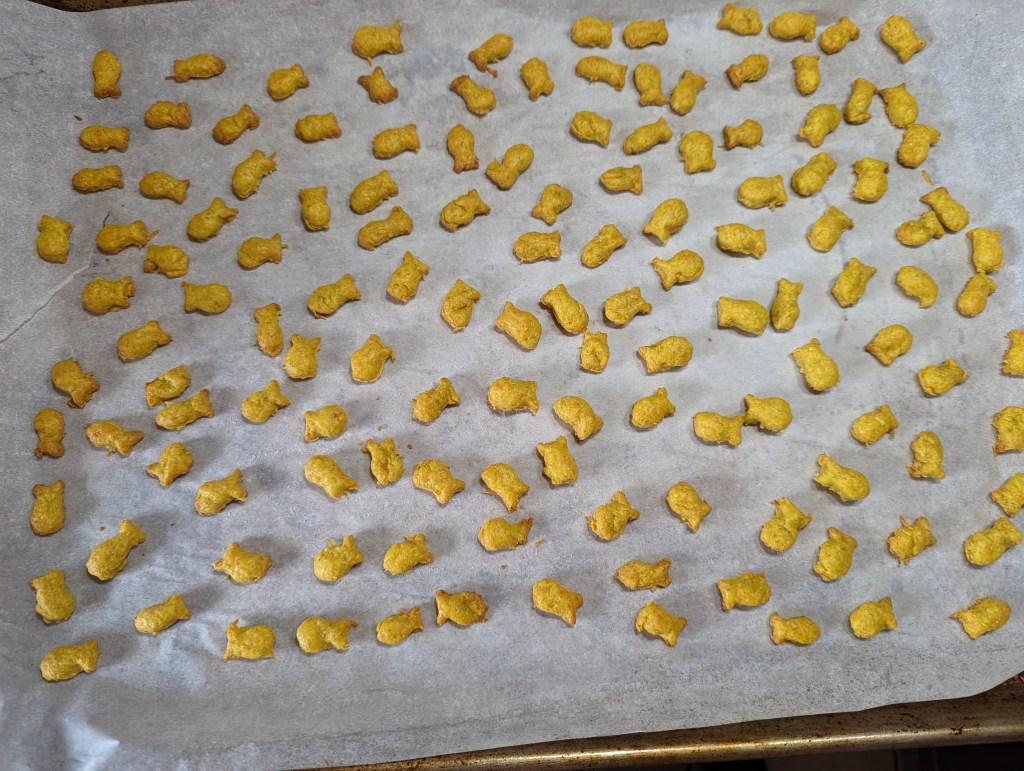
I rolled out the dough on my silicone mat on top of the parchment, cut the crackers then transferred the parchment and crackers onto my baking tray
I always love an excuse to try out a new gadget, My mom gave me this pampered chef cutter and it really made a nice effect for the crackers: https://amzn.to/49Clyuj I always seem to get my shapes really wonky when I use the pizza cutter but that works nicely as well. I have seen others use a ruler to cut the crackers so I suppose I could do that but I’m not that fancy 😅
I like the effect of brushing oil on top of the dough before baking, it adds a little bit of extra crisp and makes the salt and seasonings stick better. I really like the avocado oil spray from Costco, it’s quite convenient and only has one ingredient. You can certainly use a brush to apply oil also if you prefer.
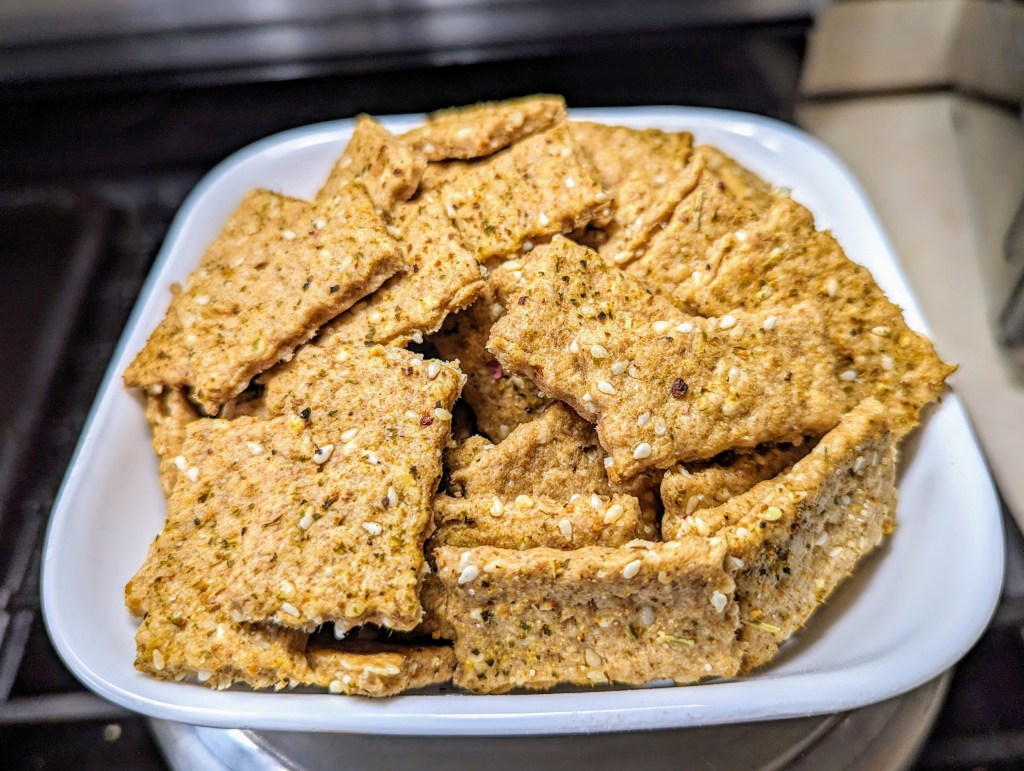
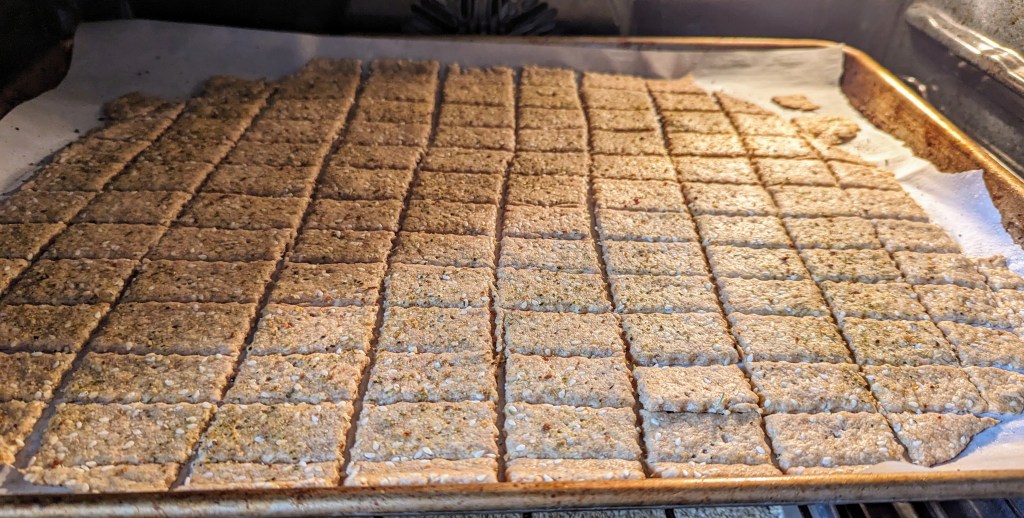
Partially baked crackers. The little bits on the edges were nice testersFinished crackers minus my testers 🙂
1 cup fresh milled flour** (spelt or soft white wheat work well) 1/2 cup softened butter 1/2 cup sourdough discard unfed 1 cup soft goat cheese (about 4-5 oz) 1 tablespoon rosemary dried or powdered depending on preference 1/2 teaspoon smoked paprika 1/2 teaspoon onion powder 1/2 teaspoon garlic powder 1/2 teaspoon salt 1/2 cup sesame seeds Avocado oil for brushing before baking All-purpose seasoning for sprinkling Additional salt for sprinkling
Directions:
1. Preheat your oven to 325°F (165°C)** and cut parchment paper to fit baking sheet 2. Mix the ingredients: In a mixing bowl, combine the softened butter, sourdough discard, crumbled goat cheese, chopped rosemary, salt, seasonings and sesame seeds (if using). Mix until well combined then knead until nicely mixed 3. Add the fresh milled flour: Gradually add the fresh milled flour to the mixture, stirring until a soft dough forms. Adjust the flour as needed. The dough should be soft but not sticky. If it’s too dry, you can always add more discard. 4. Roll out the dough: Place the dough between two sheets of parchment paper and roll it out to your desired thickness (about 1/8 inch or 3mm). Thinner crackers will be crispier, try to keep the thickness even. 5. Brush with avocado oil: Lightly spray or brush the rolled-out dough with avocado oil. 6. Sprinkle all-purpose seasoning and additional salt on top of the dough. 7. Cut into shapes: Use a pizza cutter or knife to cut the dough into squares or rectangles. You can also use cookie cutters for fun shapes. 8. Prick the crackers: Use a fork to prick each cracker a few times. This prevents them from puffing up too much during baking. 9. Transfer to the baking sheet: Carefully transfer the cut crackers to the prepared baking sheet. 10. Bake for 12-15 minutes: Bake in the preheated oven until the crackers are golden brown and crisp. Keep an eye on them, as baking time may vary depending on thickness. I had to put them back in the oven for another 2 rounds of 10 minutes in order to get the middle crackers crispy. 11. Cool and enjoy: Let the crackers cool completely on a wire rack. They will become even crispier as they cool. Serve these flavorful crackers with your favorite cheeses, olives, or charcuterie.
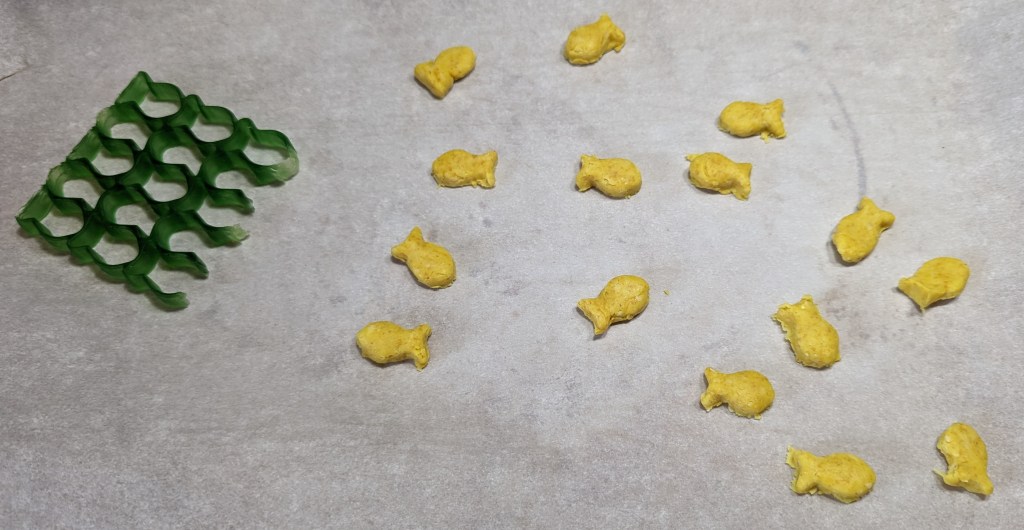
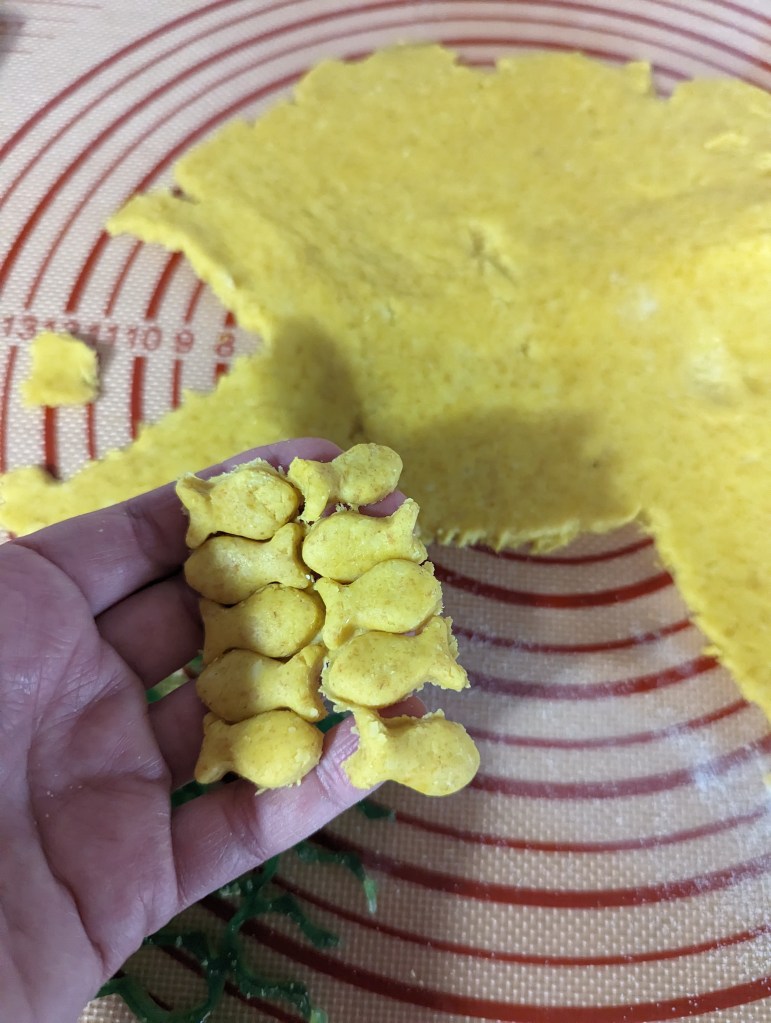
I had a 3D printed goldfish cracker mold made and I’ve been so excited to use it. Finally, today is the day!
It was actually not as fiddly as I thought it would be and the more I used the cracker cutter the easier it got. Now I’m trying to control myself and resist the impulse to go to the library to print a million different cracker and cookie cutter shapes!
3d printed mold. The printer was having a hard time but the cutter got the job done!
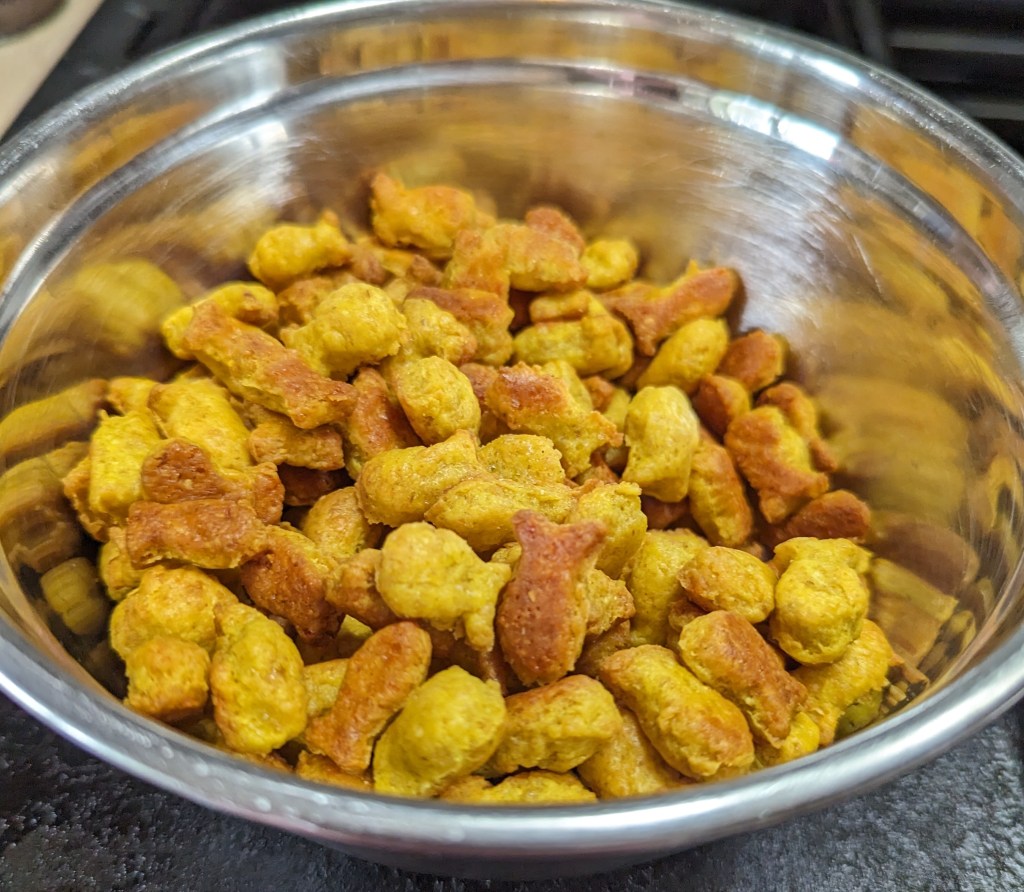
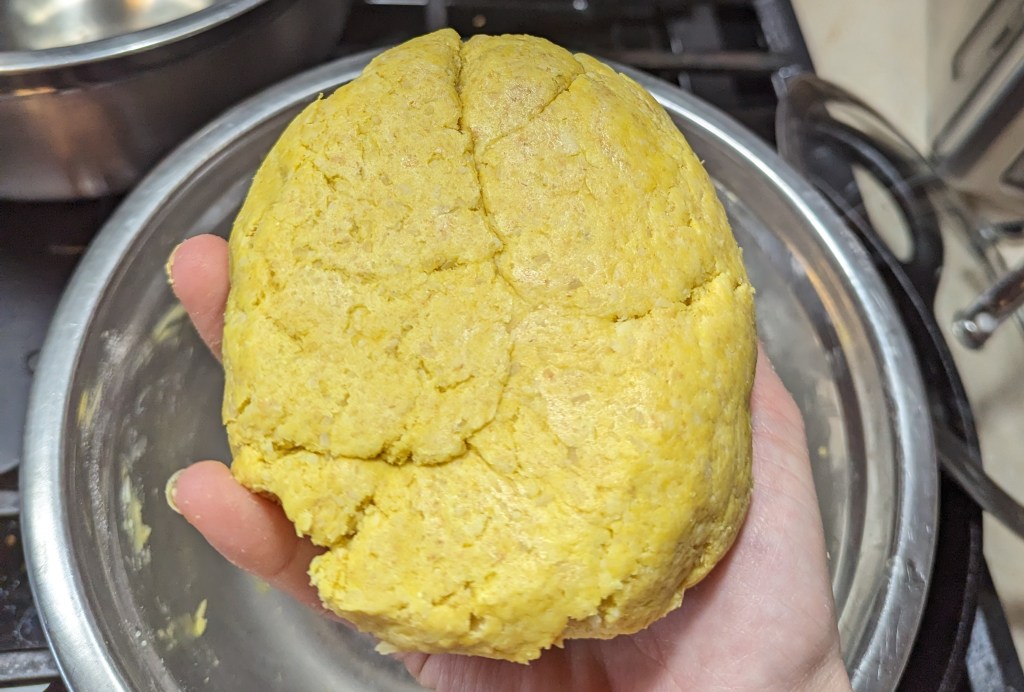
My recipe called for 100 g of sourdough starter, 225 g of grated sharp cheese and 55 g of soft butter. I used my whole grain, sourdough starter along with 120 g white flour. Next time I will try whole grain flour now that I’ve seen how they turn out using white. I also ended up adding in about 30 g more starter to get a nice consistency for rolling. It is a very firm dough.
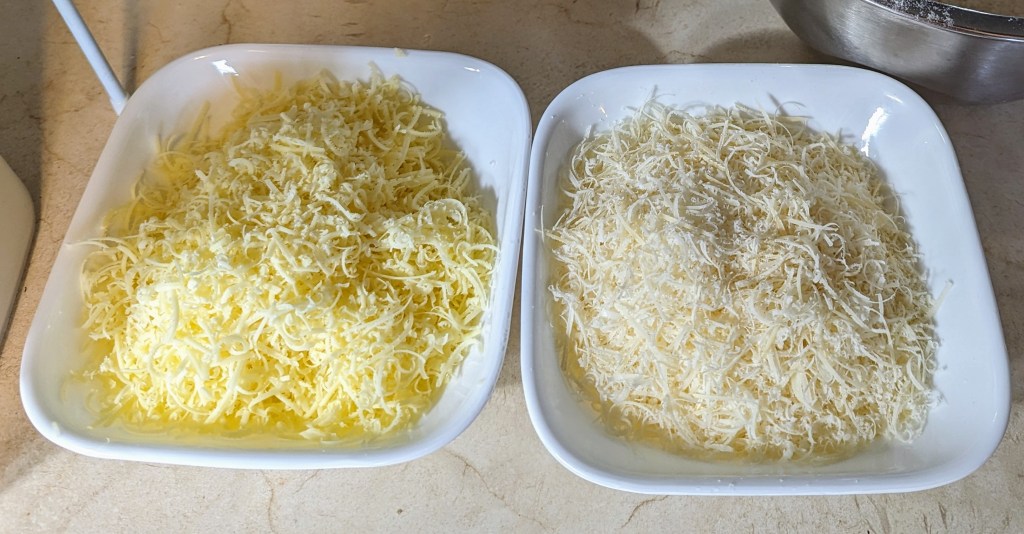
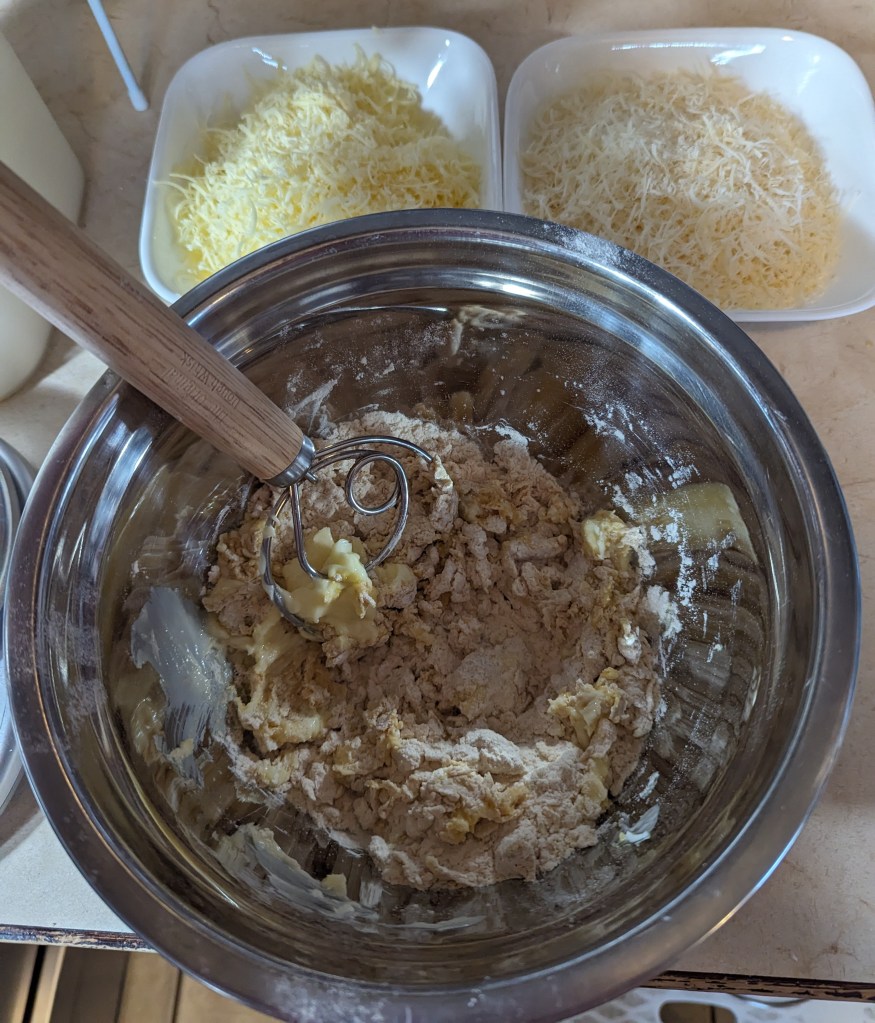
225g of parmesan and sharp cheddar. Incorporating the starter, flour, seasonings and butter. I love my dough whisk for projects like this that are difficult to stir with typical spoons or whisks
I chose to use half fresh grated Parmesan and half aged cheddar. I was able to grate up the rind of the parmesan which is a nice way to use up the hard to use pieces. I used my Saladmaster to shred the cheese really fine. It’s a great tool for a quick job and really easy to clean up. 225g of cheese looks like a large amount when shredded finely, these are a very cheesy cracker! You could use a food processor to make these crackers and mix the dough if wanted but I didn’t find it necessary and preferred not to deal with the clean up.
The fine shedding cup on my treasured vintage Saladmaster food processor
I added in nutritional yeast, onion powder as well as some turmeric powder for color.
Finished dough, doesn’t look like much but it made a lot of crackers!
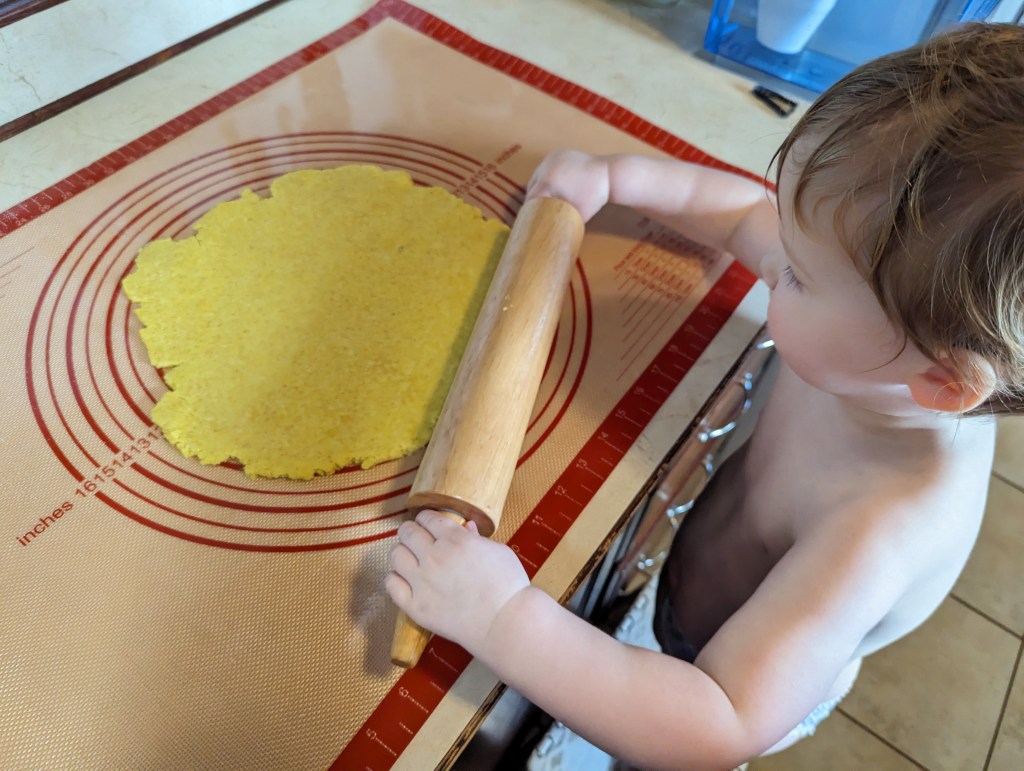
I tried to keep the crackers a consistent 1/8 inch thick but they varied as I rerolled out the dough to use it all up. They all cooked nicely though. I recently was gifted this amazing silicone baking mat (Thank you Debbie!) for my Sourdough bread and am kicking myself for not getting one sooner. It is a game changer for projects like these. It really helps with keeping things from sticking to the counter and makes clean up easy. Here is a link to the one I have: https://amzn.to/3Tk7Vu9
My son was really excited to help me bakeCutter in actionFirst finished batch
This dough can be made up ahead of time and baked when ready. The extra time develops the flavor and gives the gut benefit of extra fermentation time. If you want a quicker option you can roll these out on a sheet of parchment and score them instead of fiddling with cracker cutters, equally delicious though not as cute!
The crackers turned out so adorable and delicious, it was hard for me to share them with the kids!
Combine the dry ingredients/seasonings then add the starter, butter and cheese. I used a dough whisk to incorporate but you can use your hands. If the dough is too dry and crumbly you can add water or more starter. Whole grain and fresh milled flour takes more water. Cover the dough and chill. Preheat oven to 350 F. Roll the dough out on a lightly floured surface to 1/8th inch thick then cut out cracker shapes. Lay crackers out on parchment or a silicone lined baking sheet. Bake for 15-20 minutes, you can tell they are ready when they turn golden
Okonomiyaki is a savory Japanese pancake that is typically made up of flour, eggs, cabbage and a variety of vegetables and meats. I first tried it in college when my roommate and dear Japanese friend Natsuko treated me. Every time I make this dish I think of her.
It is a great option for a savory breakfast or any meal really. It is also a quick way to use up random bits out of the fridge. You can easily make it meatless or low carb if you choose. Okonomiyaki means “grilled as you like it” so although my recipe isn’t exactly authentic, I think the name supports trying whatever fillings and toppings you like 🙂
Ingredients used in today’s okonomiyaki
I love to use sourdough starter in place of flour as much as I can. For this recipe I reduced the amount of starter and added an extra egg. You can substitute a low carb flour like coconut or almond if desired, you just want to make sure the consistency is like thick pancake batter.
I happened to have lots of avocado on hand so I blended half of a small one up with the egg mixture and the result was tasty! If you want really smooth results an immersion blender works great, I decided to try my much loved milk frother and it worked great! I have had this one for 4 years and bought it multiple times as gifts for people: https://amzn.to/493gmPr
This recipe makes approximately two 4-5 inch pancakes depending on the amount of add-ins. You can add more starter and egg if needed to ensure all the toppings are covered in batter.
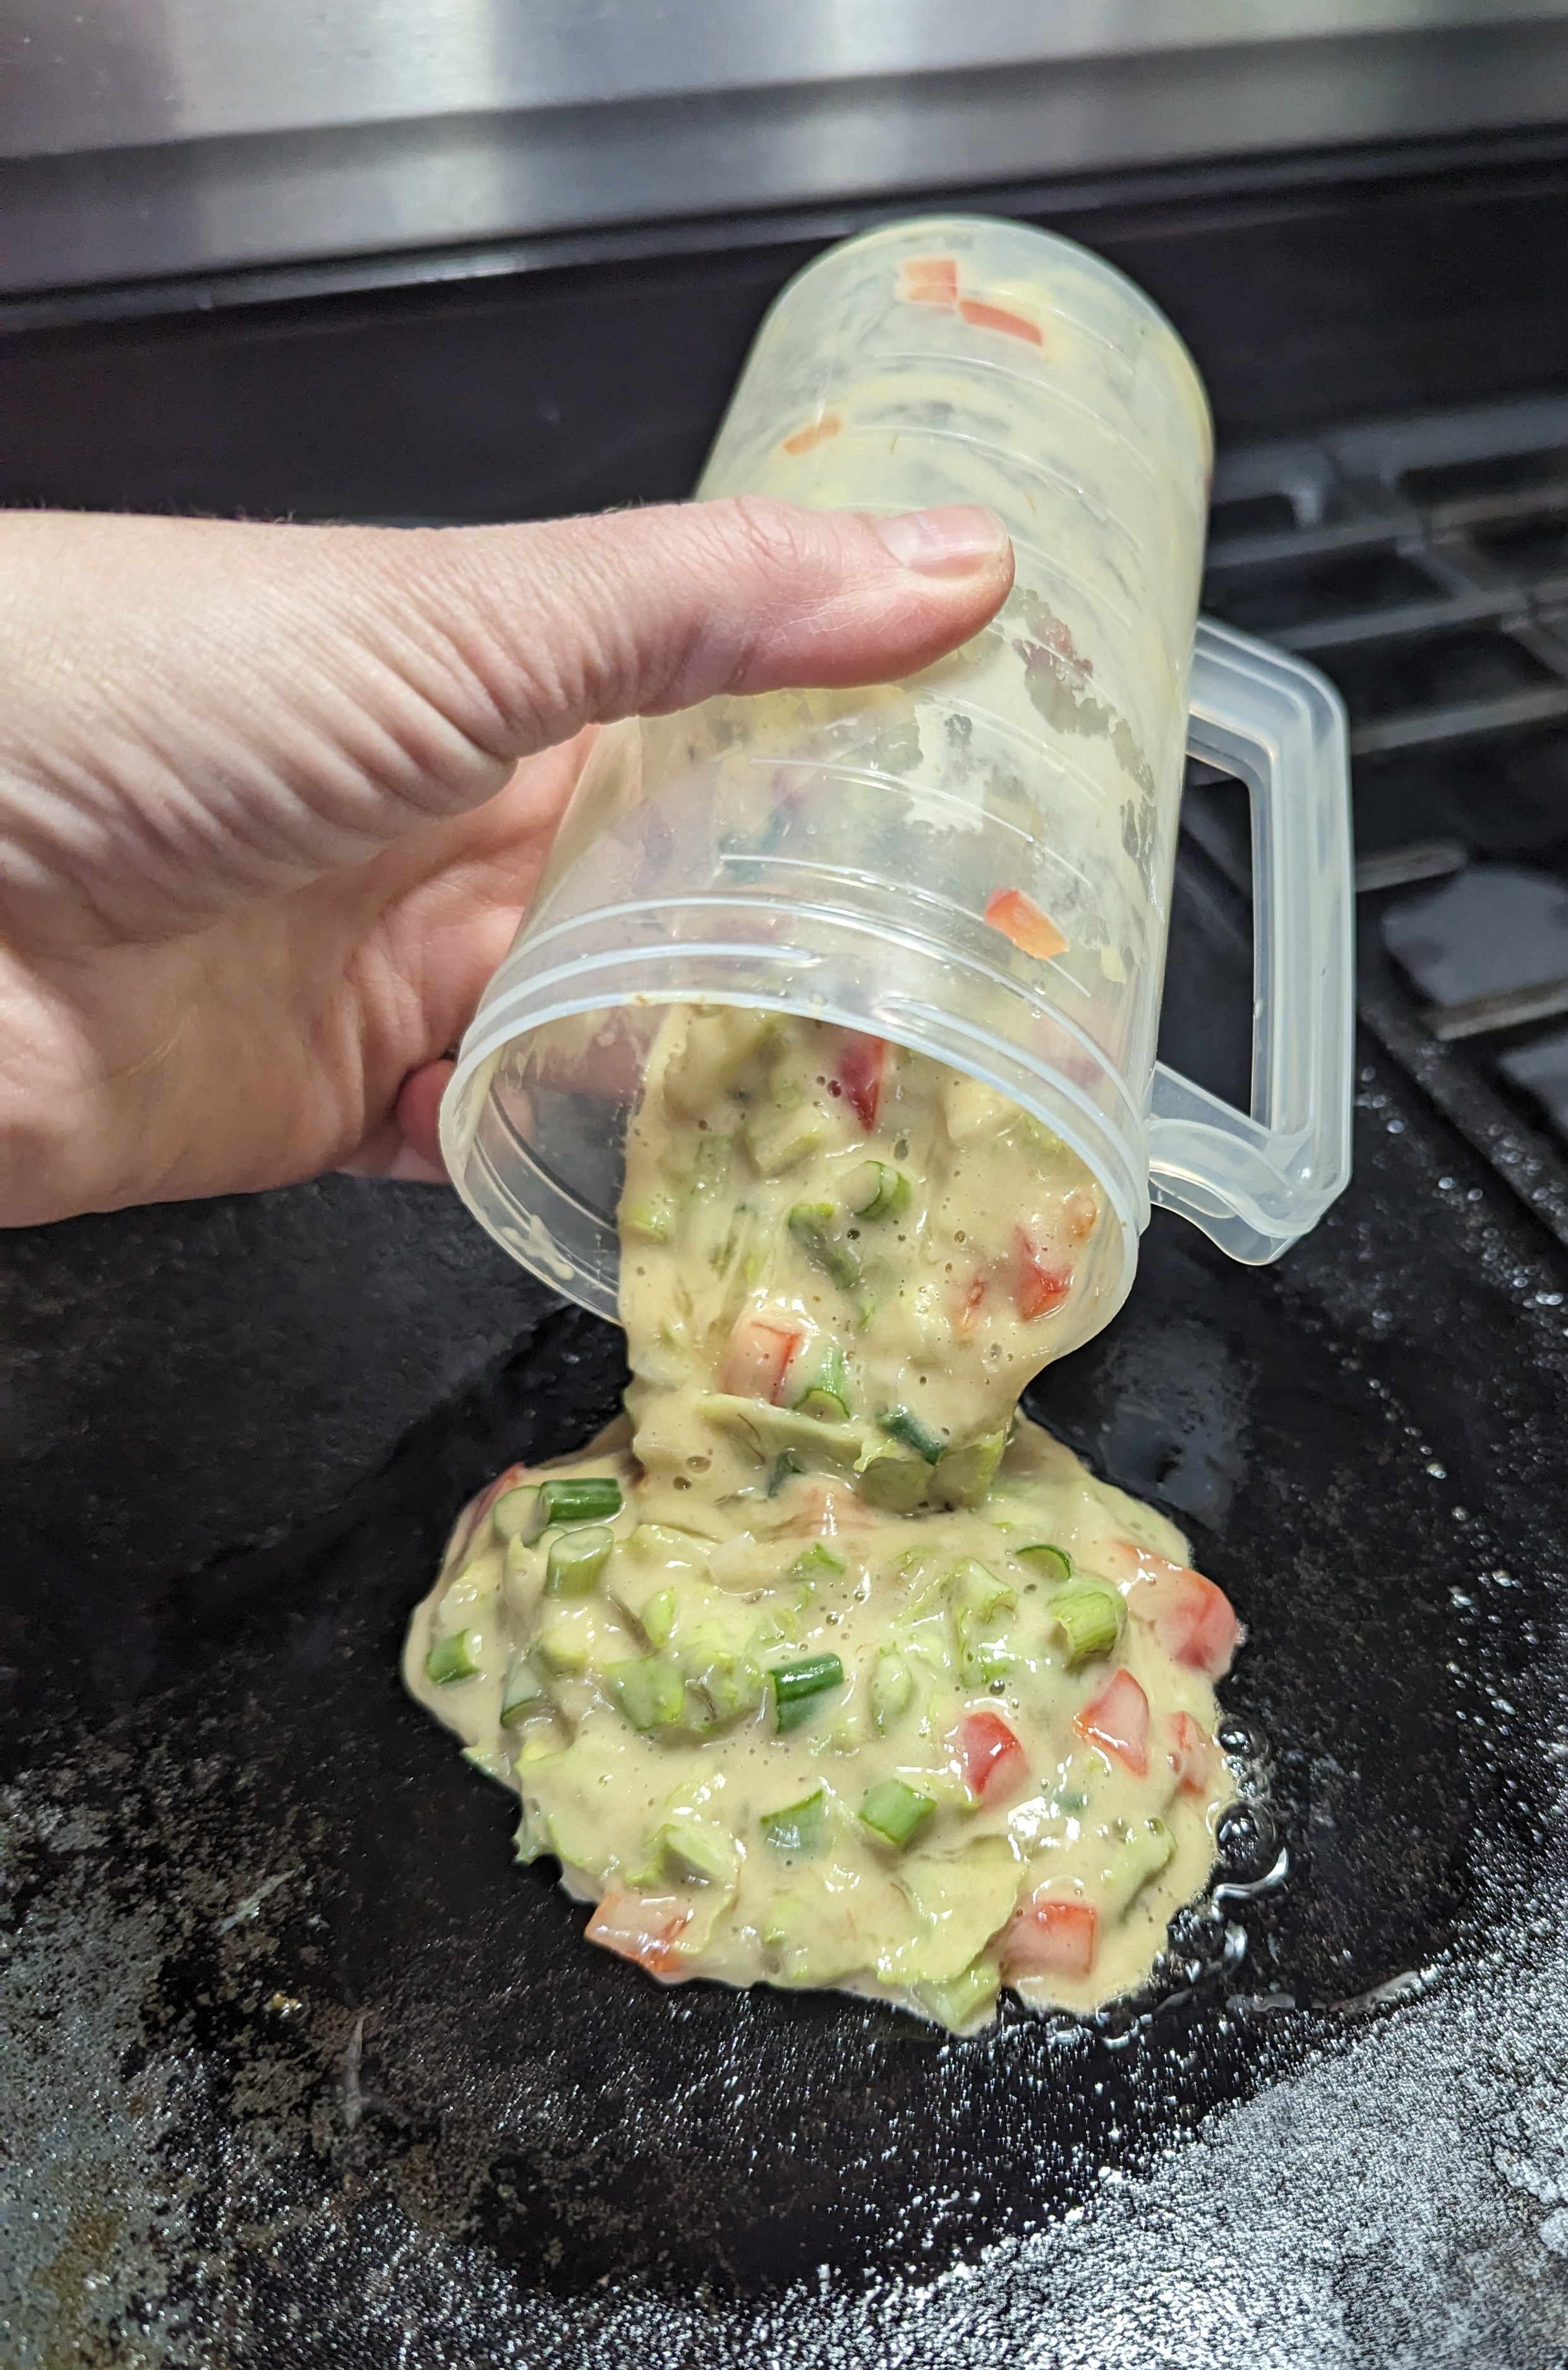
Pouring batter onto the hot grill showing consistency
As with most of my cooking, I like to experiment and quantities aren’t set in stone so you can play with the recipe and still have delicious results. If you want to just make one you can save the batter in the fridge for when you are ready for another!
Ingredients: For the pancake: 2 eggs 50g sourdough discard 1 cabbage leaf, finely chopped or grated (I used Napa cabbage) 2 diced green onions Finely diced peppers A splash of soy sauce and sesame oil 1/8 tsp powdered ginger or fresh grated Oil (for frying)
Other filling ideas: Meats: shrimp, chicken, ham Bean sprouts Shredded carrots Leftover cooked veggies diced Mushrooms
Optional toppings: Kewpie (or another mayo) Hoisin sauce BBQ sauce Roasted sesame seeds Sriracha Green onions Avocado slices Sprouts
Directions: Combine sourdough discard, egg, soy sauce, ginger and mix well with fork or whisk until it becomes a batter like consistency
Add in shredded vegetables and stir until coated
Heat up oil on a skillet on med-high heat then pour in mixture and shape into pancake about 4-5 inches across
Cover and cook for 3-4 minutes, or until bottom is golden brown. Flip and continue cook for another 3-4 minutes, uncovered
Serve with toppings of your choice. I like to drizzle mayo mixed with a hot sauce and top with sesame seeds, scallions, sprouts or something crunchy
Thanks for checking out my recipe, please consider sharing and subscribing if you like my recipes!
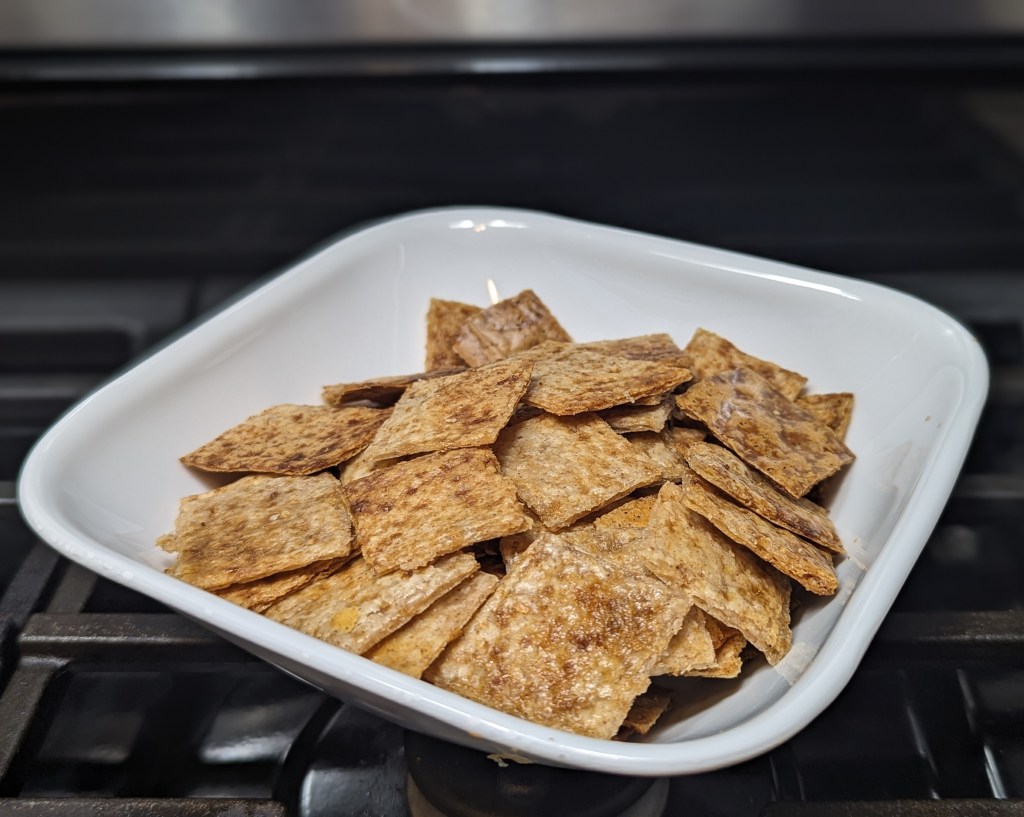
In my quest for making more home made snacks and school lunch items I’ve been experimenting with different cracker ideas. It’s a great way to use up cheese ends or if you buy hard cheeses with a rind it makes a tasty snack out of the bits that aren’t as enjoyable to eat fresh. I also use this technique to use up cheese sticks that I send in my son’s lunch that come back home!
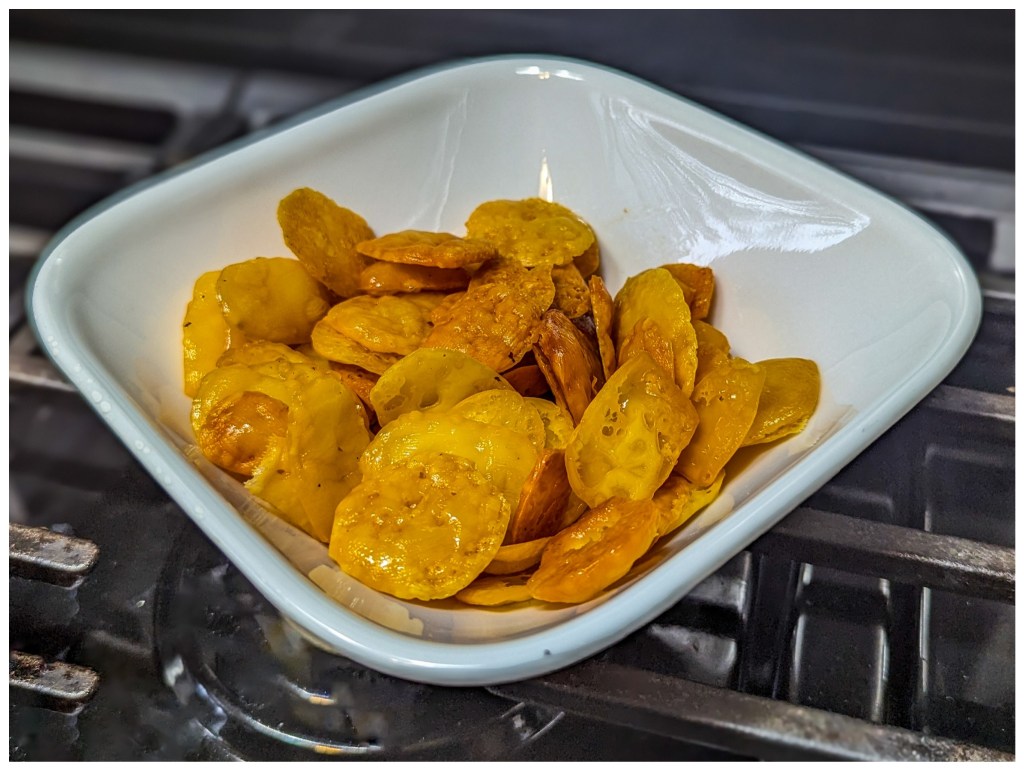
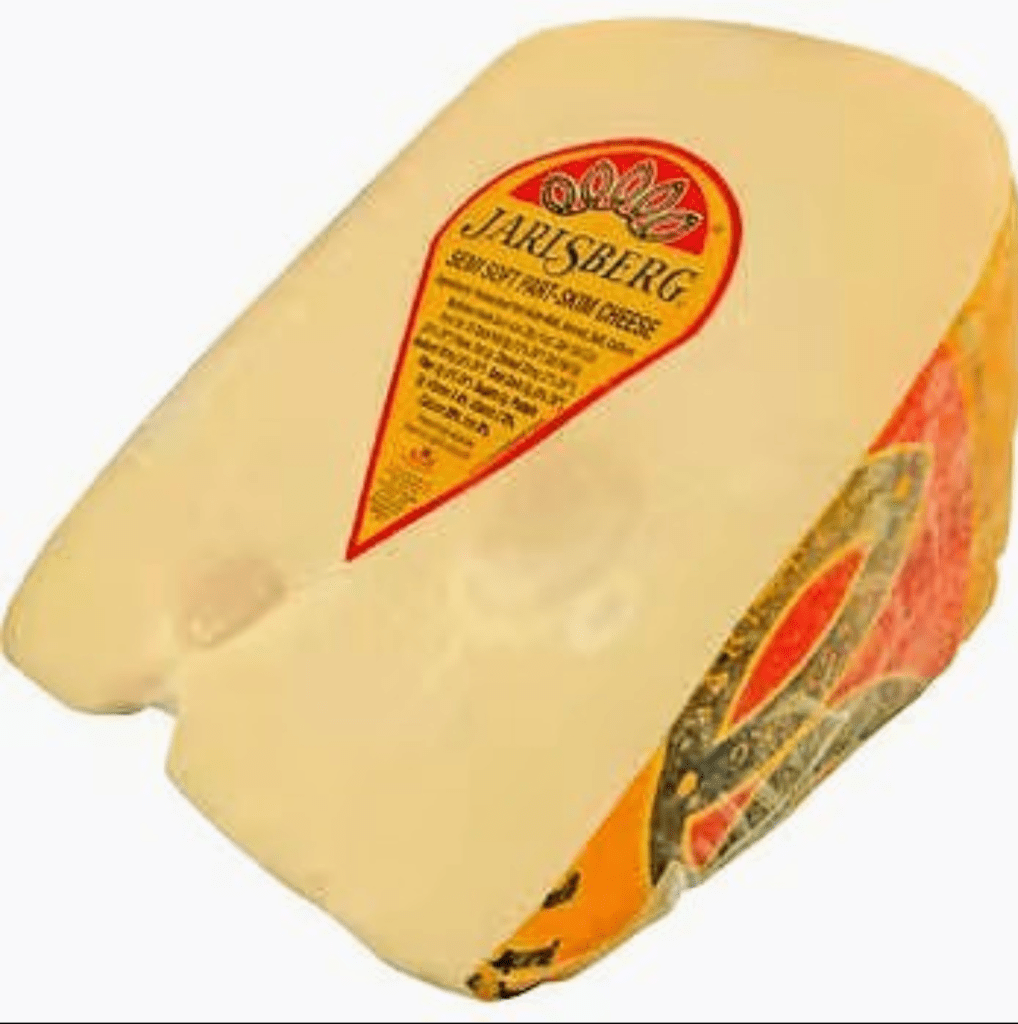
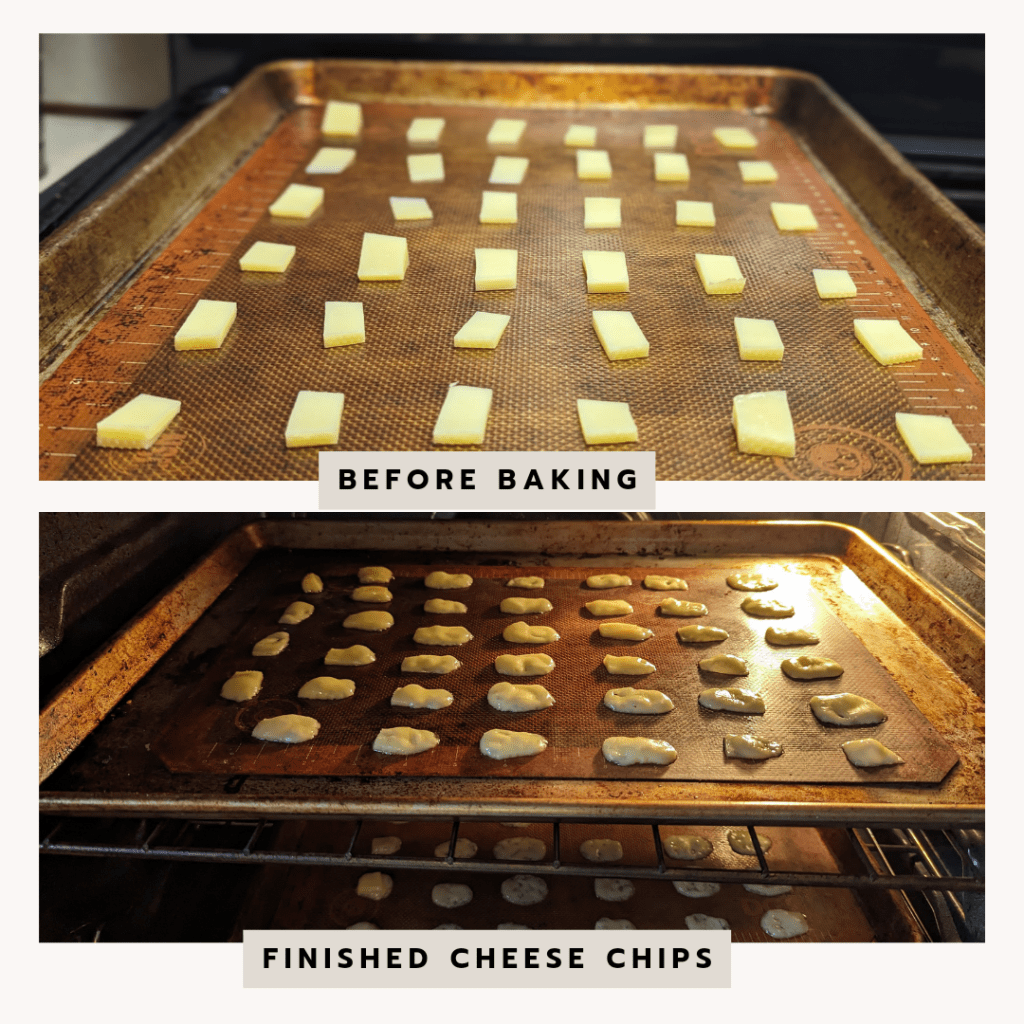
I find that harder cheeses like parmesan keep their shape and puff up more, softer cheeses spread out more and make more of a chip and are equally delicious as well. The cheese I used in the main photo is Jarlsberg semi soft part-skim cheese. It is very firm and comes wrapped in wax.
Cheese end diced and prepped for baking
You can cut the cheese any size you’d like, I like smaller pieces so you get more chips. These are about a centimeter square. With harder cheeses you don’t need much space between them when baking but if using softer cheeses they spread and flatten more so space them out more generously. I recommend watching closely because they can get overcooked quickly!
Here’s how to make the one ingredient cheese chips that are sure to be a hit!
I’ve really wanted to start making crackers for my family. I don’t care for the extra ingredients and additives in store bought. I have made regular Sourdough discard crackers and seed crackers already and love them.
This is a delicious treat that tastes like cinnamon toast crunch without the guilt. Great for kids snacks and lunches if you decide to share! It’s made with minimal ingredients and you can reduce the sugar as much as you’d like. I made them this morning and the batch didn’t last till noon!
When I made my crackers, my starter had been recently fed and was pretty active. I found the batter was a bit thick so I added some sour milk to thin it out. I used my immersion blender to incorporate all of the ingredients but with older inactive starter that is more liquid this may not be necessary. I also found the suggested amount of butter seemed a bit much so will experiment with reducing it by 1/4. To make this dairy free, next time I will try coconut oil and will post an update.
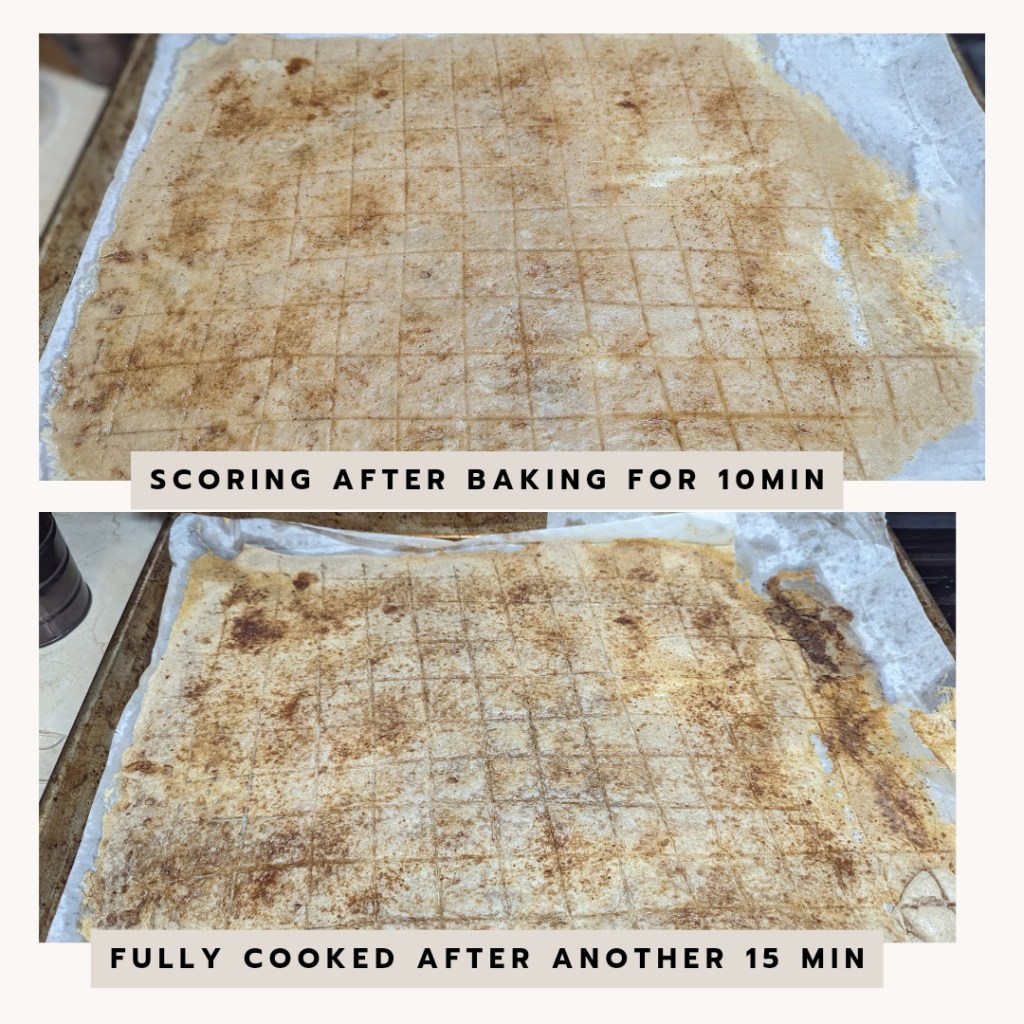
The batter spread quite easily on the parchment with a spatula. I sprinkled coconut sugar on the wet dough. I only used about a teaspoon and found it was plenty. I like coconut sugar because it sprinkles easily and has a nice flavor.
You can tell the crackers are finished when they easily break apart. If they bend they need a bit longer in the oven.
I store them in a container with the lid open for the first day to make sure they have dried out properly. They last about 4-5 days but this batch was gone before lunch 😂
If you are enjoying my recipes please consider subscribing so you can be notified when new recipes are posted!
Some of the links below are affiliate links, which means I will earn a commission at no additional cost to you, if you click and make a purchase. I only link to products I love and have made space for into my small kitchen.
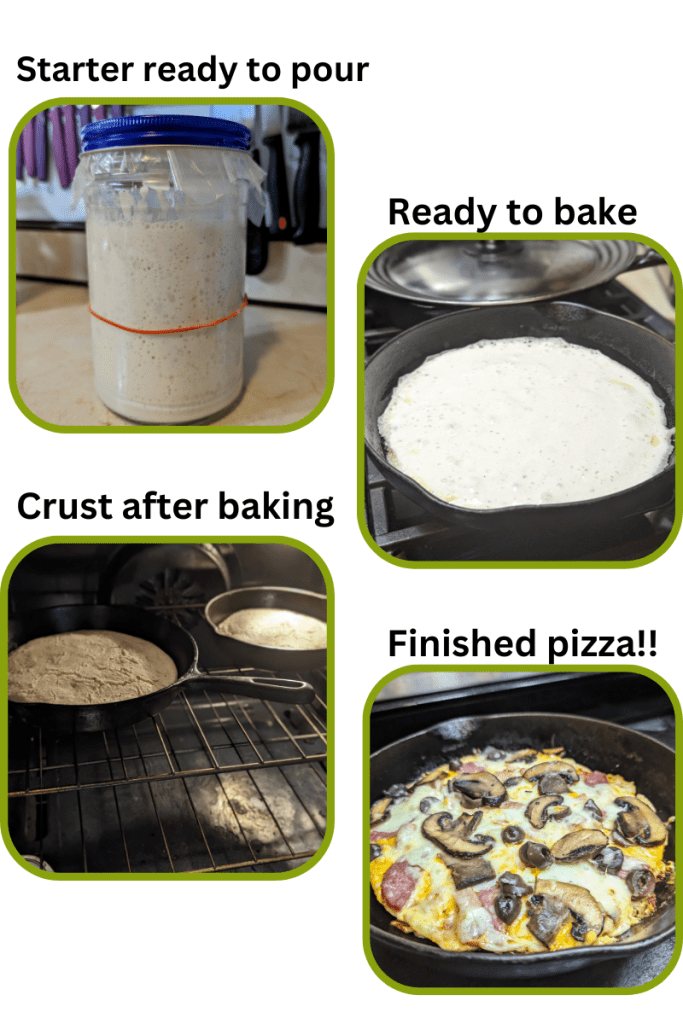
I’ve had pizza on my list of things I wanted to make for awhile but I always seem to get stuck on the planning ahead bit to make the crust. I came across the idea to use sourdough discard poured directly into a pre-heated cast iron pan and I am obsessed! It’s the easiest thing in the world and it turned out so delicious. I’ve been enjoying experimenting (and having easy meals haha) and have made pizzas 3 times this week already!
The basic ingredients required are sourdough starter, baking soda and salt. You can do as little or as much as you want as far as add ins, I used my go to favourite Club House Italian seasoning (https://amzn.to/4aoMvlT) that I like to mix into the starter. To make it even easier, I used basic pasta sauce for the pizza. It only takes about a cup to cover 2 medium pizzas and 1 small pizza.
If you don’t have plans for the rest of the sauce, the rest can be frozen in 1 cup portions for quick use later and saves the other half of the jar going bad in the fridge. 1 cup thaws quickly and is a nice add in to a soup or stew when needed. I really like the small 1 cup Pyrex Snapware rounds for freezing small portions: https://amzn.to/4750Cd9. I have mentioned them in other posts that I use them as glass weights in fermenting also: They have a great seal, don’t spill, lids and containers stack nicely and are very versatile. The larger 2 cup containers I use to meal prep for lunches and the bigger rectangles are great for a family sized dinner of chili /soup etc. I also have a couple of Snapware sets with plastic containers: https://amzn.to/41rVKO6 The lids are all interchangeable, the glass and plastic containers stack nicely, and I haven’t had any problems with staining or retaining smells. Anyways, I digress, back to pizza!
To start, put your 10-12″ cast iron pan into the oven and preheat to 450ºF. While the oven heats up prep your toppings. Once preheated, pour some oil into the pan and spread around (I use avocado because it has a high smoke point) mix seasonings and salt into 2 cups of sourdough starter. Mix half a teaspoon of baking soda into starter mix. It puffs up quickly so be ready to pour it into the pan! Dump the starter mix into the pan and rotate to spread then return the pan to the oven to bake for 10 min.
After 10 minutes remove the pan from the oven, add sauce, cheese and toppings of choice then return to oven for another 10-15 minutes depending on desired crispiness of cheese.
My son loved decorating his own personal pizza, credit to him for making the beautiful pepperoni pizza in the cover shot! For safety, I removed the crust from the cast iron for assembly then popped it back in the pan for baking. I love how it turned out and how you can get cheese and toppings all the way to the edge. The oil underneath crisps up the bottom nicely and it reheats beautifully in the toaster oven. I have made the pizzas in the regular oven 3 at a time and also in my Cosori toaster oven, all have turned out great and are done from start to finish in under 30 min.
I made pizzas again recently and decided to experiment with thinning out the sourdough discard with some water, the results are a thinner crust pizza with I topped with pesto. It was quite delicious also and a way to get another pizza if there is only a bit of discard left after making a couple of pizzas already
Thin crust pesto and mushroom pizza plated
Sourdough discard pizza crust
Ingredients:
1 cup sourdough starter 10″ cast iron pan Oil of choice (I use avocado because of high smoke point) Seasoning: salt, Italian seasoning, dried garlic Baking soda
Directions:
Preheat oven to 450f with 10″ cast iron skillet inside Pour avacado oil to coat heated pan While pan and oven heating, add seasonings to discard Just before spreading the discard in the pan add half a teaspoon of baking soda to the mix, stir then pour into heated pan Put back in oven for 10 minutes and then take out and add pizza toppings. Bake for another 10-15 minutes until desired cheese crispiness then enjoy!
Notes:
For a thin crust version, add some water to the starter mix Starter can be active or not. Active starter makes a lighter crust Reheats nicely in the toaster oven
Thanks for checking out my post! If you liked my recipe or have suggestions for other modifications let me know in the comments!
I’ve never been much of a chocolaholic (unless I make the mistake of buying the Costco sized Lindt truffles 😂) but I do enjoy it occasionally. Making chocolate is really simple with only a few ingredients and very little needed for supplies. I like being able to choose the amount/type of sweetener and add-ins to make it a healthier option. I’ve cut refined sugar out of my diet so it is nice to have chocolate made with minimal sweetener and quality ingredients.
Simple ingredients: cocoa powder, sweetener of choice coconut oil and optional cocoa butter
When I first started making dark chocolate, I used cocoa powder, sweetener and coconut oil only. I did find I enjoyed the taste of the chocolate with the addition of some cocoa butter, but it’s not always easy to find and a little more pricey. I started making chocolates when I was following a ketogenic diet and found this sweetener I quite like from Wholesome Yum which is a blend of monk fruit and allulous. I find it substitutes closely to taste and amount to white sugar. This is handy because substituting keto sweeteners has quite a learning curve when starting out!
Coconut oil cocoa butter, cocoa powder and sweetener melting in double boiler
I love how easy it is to bake with the use of a scale. I measured all of the ingredients needed into the bowl and then can use the bowl right on top of a pan with water in it as a double boiler. Very little mess and makes clean up simple! I’ve had this Ozeri scale since 2016, I bought it because it was highly rated and reasonably priced. It has been great, I use it almost daily and have never changed the batteries. It can weigh up to 5100g or 11.24lbs, switches easily between units and has auto shut off. Link to scale: https://amzn.to/47V1HFB
Once everything is melted you can put in add-ins. My go-tos are shredded coconut, chia seeds, roasted sesame seeds and pumpkin seeds. Sometimes I hide some powdered psyllium husk in the chocolates to help get in a little more fiber and make them extra healthy 😂
Roasted almonds, pecans, macadamia, nuts, walnuts etc. are also nice add-ins. I prefer to buy them raw in bulk and roast them as needed. They taste so much better! You can also add in flavored extracts, I like peppermint especially. I’ve also made orange and vanilla extracts which are nice.
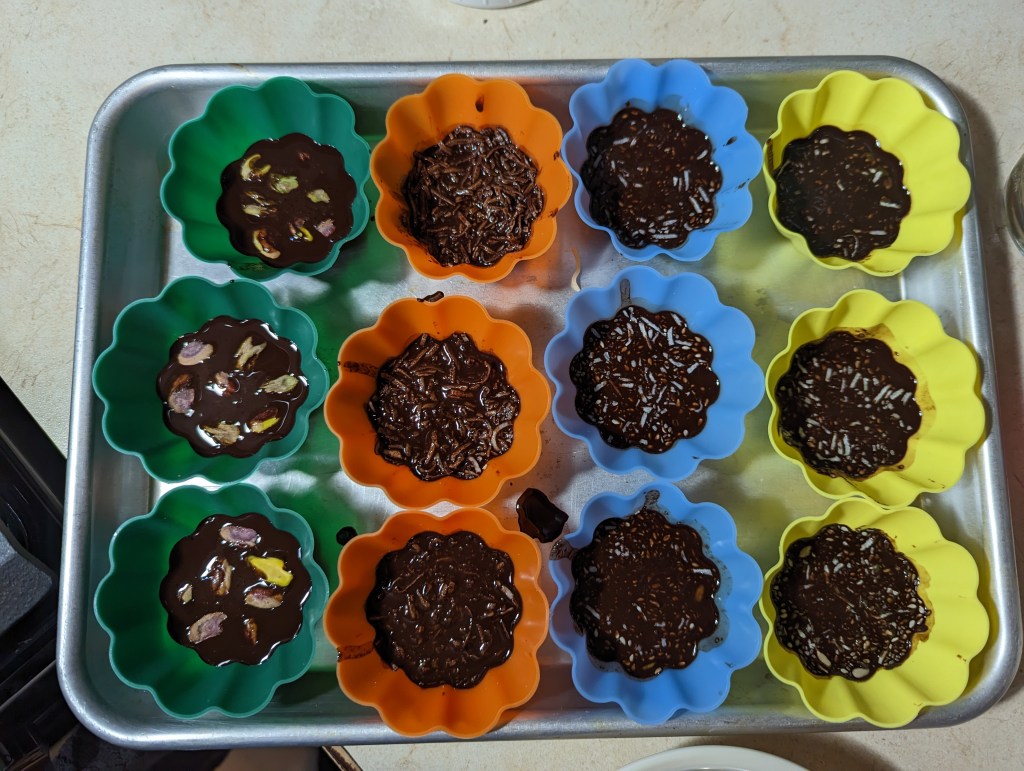
When I started making chocolates I just used silicone cupcake holders which work great. They are very easy to fill and easy to add in ingredients separately without having to put the add-ins in the whole batch.
Silicone cupcake molds with various add-ins pumpkin seeds, chia, coconuts, pecan.
I did end up picking up some adorable chocolate molds that I can’t get enough of. They are a little more fiddly to fill but so worth it. I love the finished result and they are great for making beautiful gifts.
These are my proper chocolate molds they fit an almond or nut quite nicely topped up with chocolate though you can see I’m a little bit sloppy on filling them without spilling! Link to molds: https://amzn.to/3RIdlOM
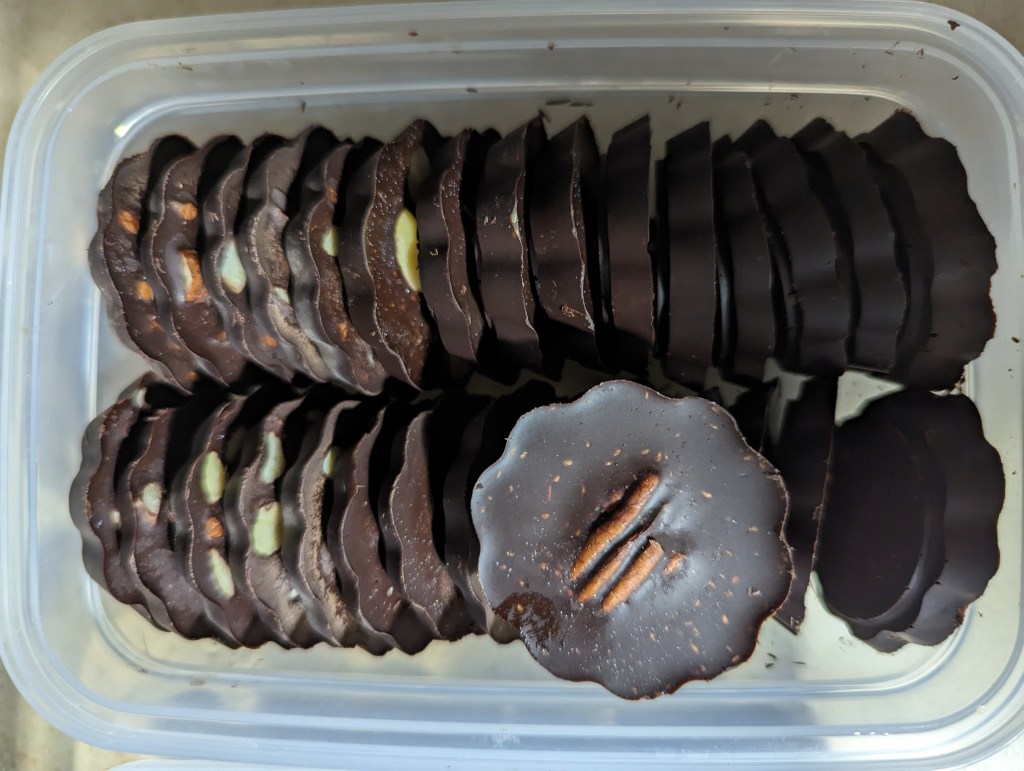
I usually put the chocolates in the freezer to cool. I find they have a nicer finish if cooled in the freezer versus in the fridge. Once cold you can pop them out of the mold. I keep the chocolates in the fridge because they don’t stay at room temperature as nice as store-bought does. Cocoa butter does make them a lot more temperature stable than the chocolates made with just coconut oil.
Chocolate’s ready to come out of the mold after cooling!
I think they turned out so beautifully, I especially love the flowers!Finished chocolates 🙂
There is usually some remaining chocolate in the bowl because I can’t let anything go to waste. I’ve started tossing roasted almonds or whatever nuts I have around in the bowl, then laying them on parchment or a silicone mat. They make a delicious treat and use up every little scrap of chocolate 🙂
Chocolate coated almonds made from the remainder of the chocolate bowl
Homemade Dark Chocolate Keto ★★★★★ Desserts, Keto
Ingredients:
100g coconut oil 50g cacao powder 1 tsp sweetener (or to taste, I use Wholesome Yum Besti) Optional: cocoa butter If using cocoa butter also, I add a ratio of 2:1 50g cocoa butter and 25g extra cocoa powder (total of 75g cocoa powder for this recipe)
In a small metal heat safe bowl, combine coconut oil, cocoa powder, (and cocoa butter if you are going to use it). Put a few inches of water in a small pot and place metal bowl with ingredients on top of pot. Melt on very low heat and stir until ingredients combined and melted. You can put add-ins right into the bowl of chocolate then put in molds or what I prefer to do is pour into moulds and put add-ins into individual molds so you can try more variety. Freeze or refrigerate then enjoy! Store in fridge
Notes:
I use silicone cupcake mould, and put a table spoon of chocolate in each before adding topping and grinding a bit of salt on top. After most of the chocolate is out into moulds. I toss roasted nuts in the metal bowl the chocolate was melted in, then put on parchment or a silicone sheet with cracked salt on top.
Thanks for reading my post! I’ve added some links to the products I like to use. If you make an eligible purchase through my link I may earn a small commission. The beauty of this recipe is you can make it with whatever you’ve got at home.
If you like my content check out my Pinterest account and YouTube channel for more projects 🙂
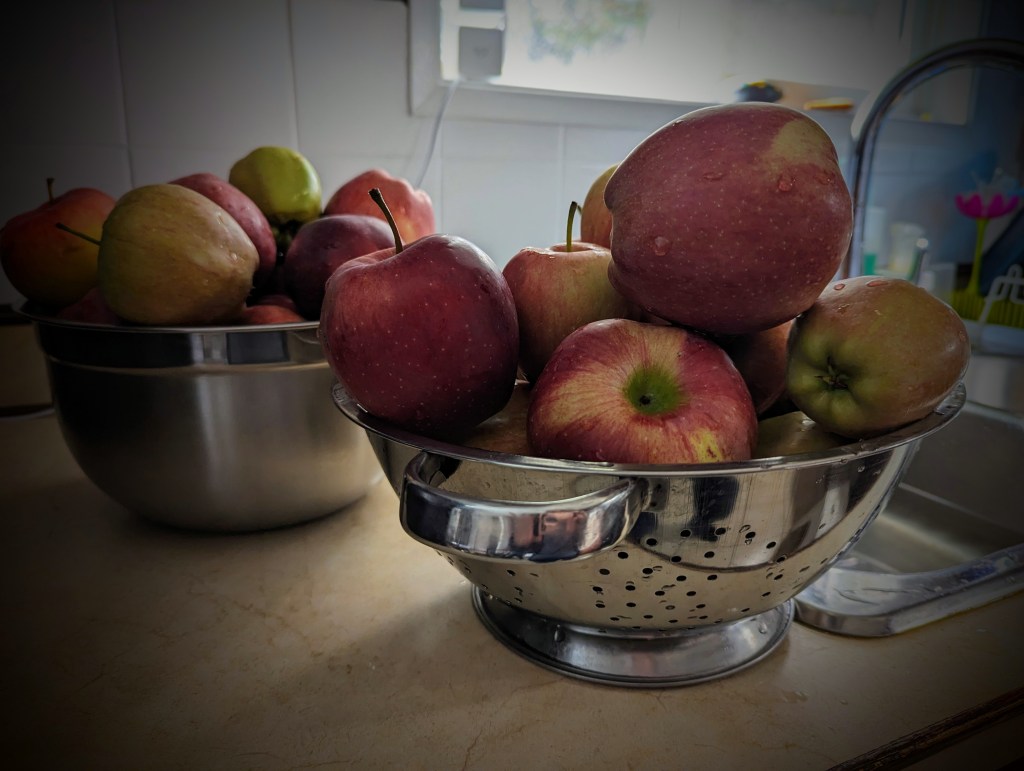
My folks have a lovely neighbour with a beautiful Red Delicious apple tree. It sounds like she’s had enough years of making apple everything so she kindly shares her apples with my family each fall.
My mom (aka my favorite kitchen partner) and I made a batch of apple chips and apple scrap vinegar a few weeks back. This time we intended to just make apple chips but of course as most of my kitchen projects go, things spiralled.
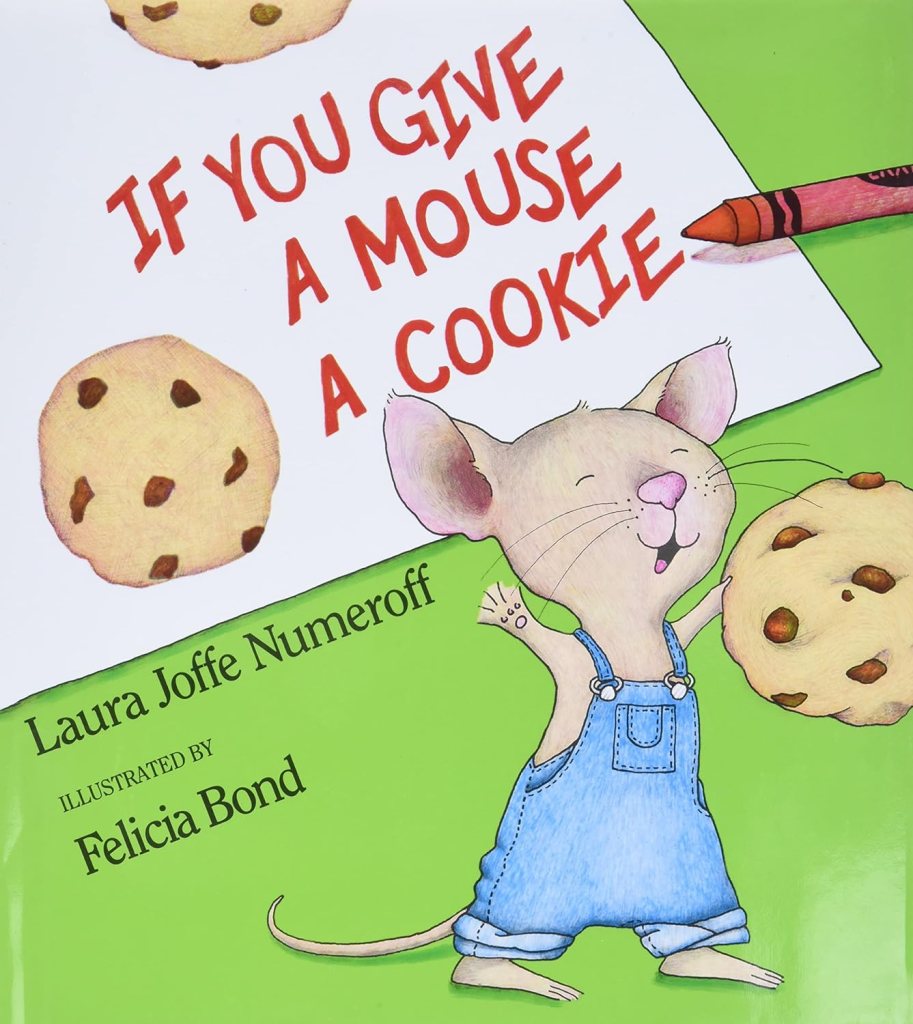
My sister (a baking master and accomplished kitchen project aficionado) and I have an ongoing joke about the kids book series If You Give A Mouse A Cookie. It’s our catch phrase to describe when we get carried away with things and find it challenging to keep our projects simple. If you haven’t heard of it, look it up and have a giggle if it describes your project style as well! Link to book: https://amzn.to/3usIoVe
Anyways, as I was saying, I like to use up every little scrap and the apple chip project grew from a morning activity to an all day and into the night/next day kind of thing. The apples had started to get soft so we opted to do two large vats of applesauce after we got our first load of apple chips into the dehydrator.
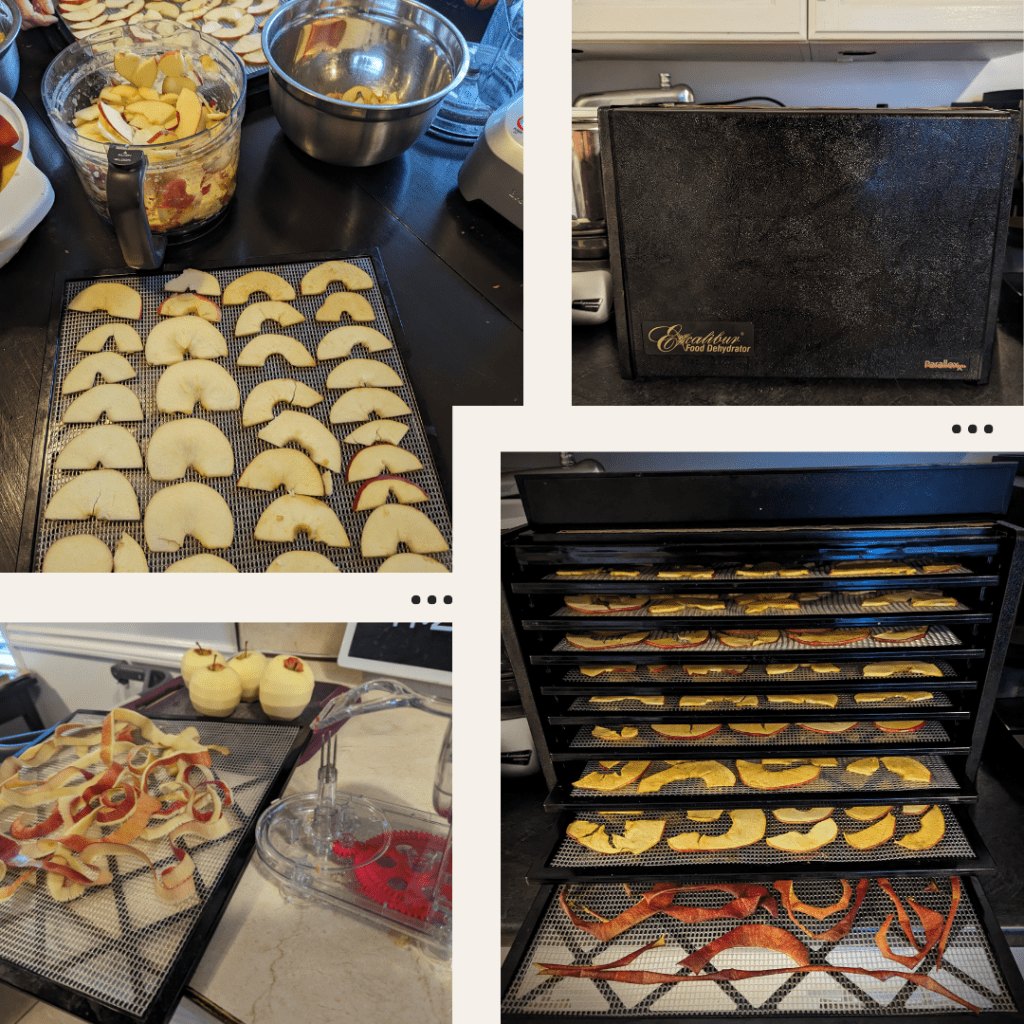
From left to right: diced apples being prepped for the dehydrator, the dehydrator in action, apple peeler at work and the finished product. Link to dehydrator: https://amzn.to/4701C2a
To dice the apples for dehydrating I used the Breville Sous Chef 16 Cup Food Processor. It’s a heavy duty machine with lots of options. It works great for cutting the apples uniformly and thin. One of my favorite features is the adjustable dicing disk. I really like that you can quickly adjust the thickness based on the softness and type of apple (it helps to have a thicker slice for really soft apple, you can get away with thinner slices with hard apples). The extra wide plunger chute is a bonus for getting a large volume processed quickly. Here is a link to the processor: https://amzn.to/3Rh2xH7
Demonstration of the Breville food processor slicing halved apples
For this project, I had a handy dandy new apple peeler to try out which made peeling the apples for applesauce very quick. It is also very relaxing to watch work! When the apples get a little older and softer however, the spike that goes to the core doesn’t always hold it in place and you can’t easily peel the apple. I think this would be an issue with any of this style peeler though and it still saved a lot of time and hand fatigue. I like how wide and thin the peel is, very little waste compared to other models I have tried that core and slice.
The peels came off so nicely in long flat strips. I couldn’t bring myself to throw them out so I experimented with dehydrating a few of them. Spoiler alert: the peels turned out tasting kind of like cardboard, however the kids oddly enough really enjoyed them!
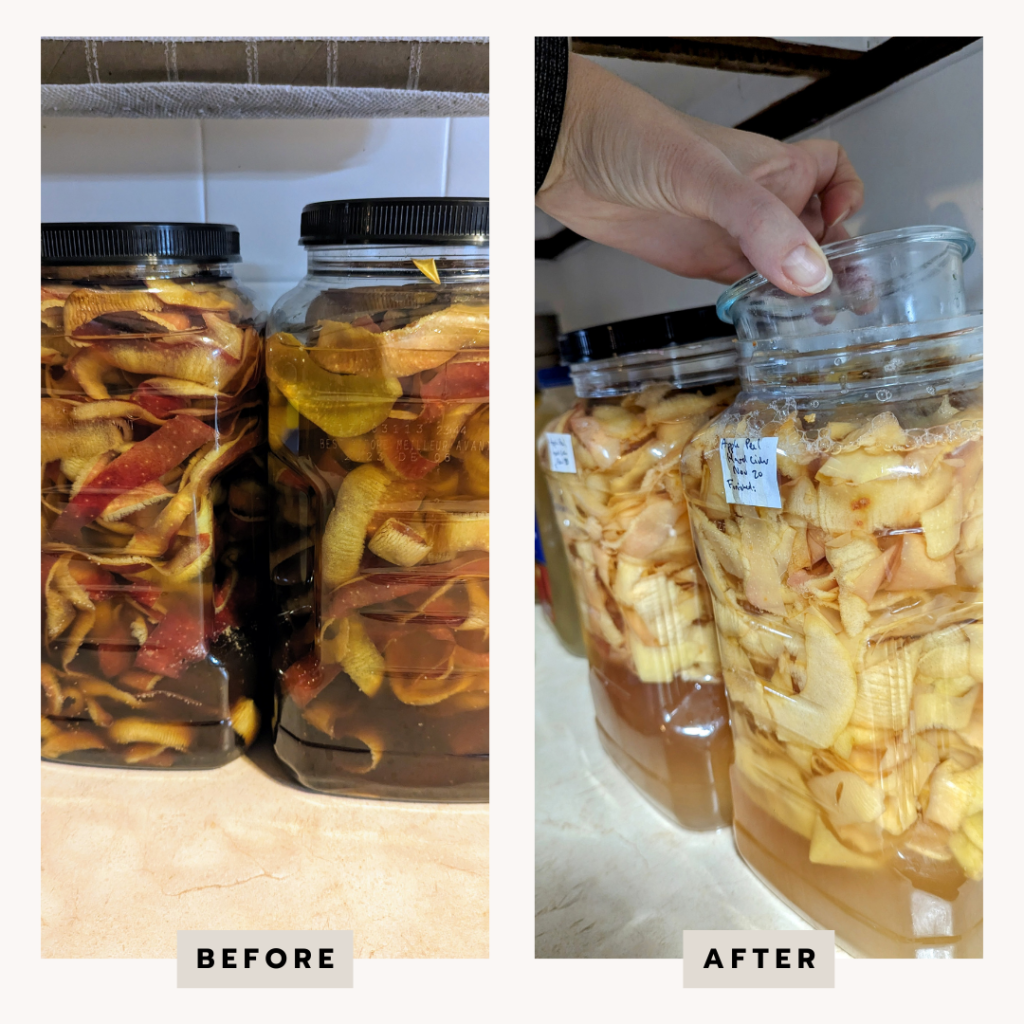
I decided to try making hard apple cider with the peels as I already have 3 huge jars of apple scrap cider vinegar on the go from the last apple sauce batch. I haven’t made hard apple cider in a long time. I used to do it quite often using an Alchema Cider Maker which has an app with recipes, and tells you how far along the cider is progressing among other things. Once you’ve done it enough times though its pretty simple to dump water, fruit/juice, sugar and brewers yeast to make hard cider. I use 1/8 of a teaspoon of yeast in this 3L container along with a cup of white sugar. I found the bubbling of fermentation kept bringing the peels above the water line. I had some small round 1 cup glass Pyrex Snapware containers that perfectly fit into the mouth of the containers and worked nicely to keep the peels submerged and prevent mold (https://amzn.to/3GebwCj). Bonus, the containers also fit into my huge 1 gallon Ball jars (https://amzn.to/47rPg48) and worked nicely for the apple cider vinegar. #pyrex-link
Those containers are actually from the Costco peanut butter pretzel bites. I can’t throw away a good container!
The canning of the apple sauce went really well. The apples cooked down nicely and I used my Bamix immersion blender to make it smooth and creamy. An immersion blender is a must have for me, I use it almost daily for making salad dressings, eggs, whipping cream etc. I’ve had a couple of brands over the years and the Bamix version is a favourite due to all metal, easy to clean, and heavy duty construction.
All in all, we ended up with 31 jars of applesauce, though one opened up and spilled its contents into the canner and was looking pretty messy.
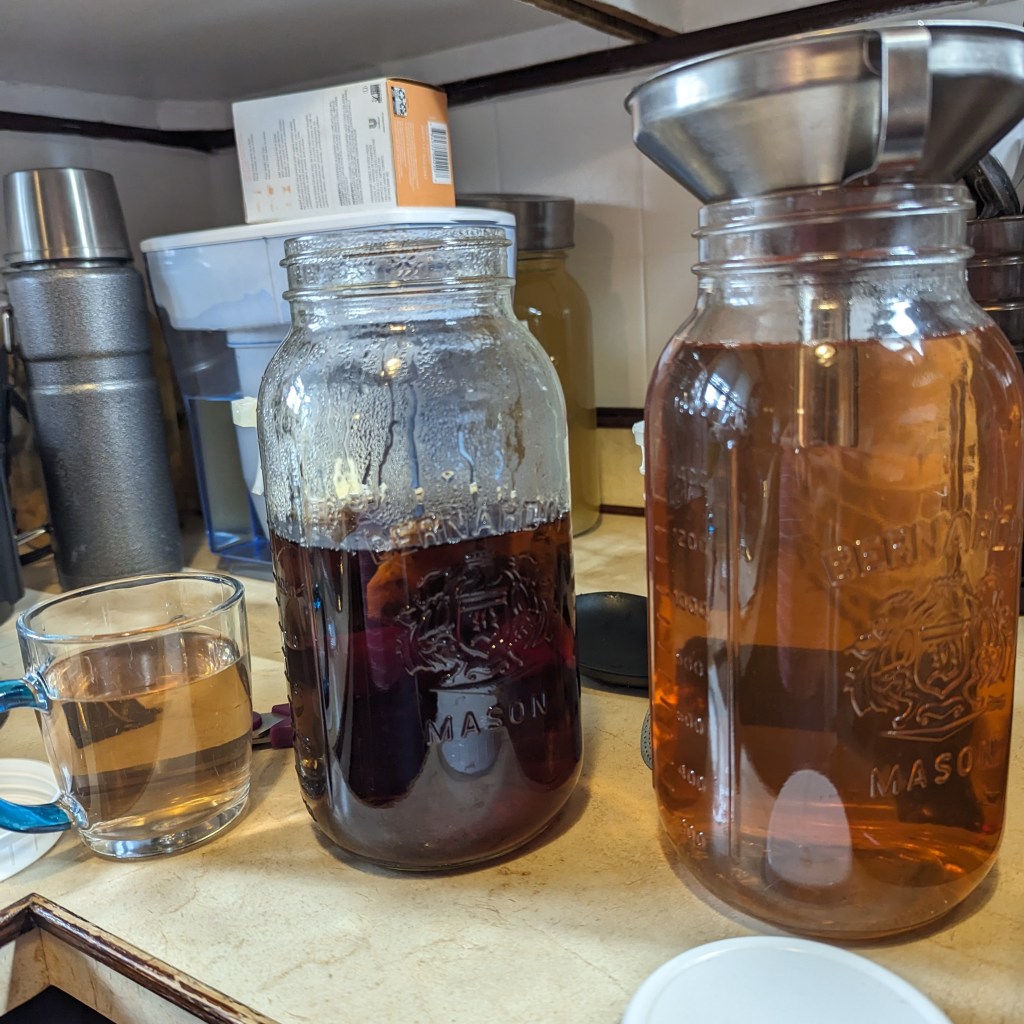
This brings me to the next surprise project. The next morning when I went to empty the canner, the water had turned a beautiful pinkish color and smelled like delicious apple tea. I was thinking there’s got to be something I could make out of that so I ended up with a new project to try.
Black tea brewing in the middle and apple tea on the right combined to make kombucha. Jars used: https://amzn.to/3sNZyMS
I bottled up plain apple tea to mix with and flavour my usual finished black tea kombucha, I also made a new batch of kombucha with half black tea half apple tea. Since starting this post I have tried the black tea apple kombucha and its my favourite to date. I’ve got another experimental kombucha on the go from a few days back made with homemade pineapple tea. Keep an eye out for an upcoming post to come on how to make pineapple tea from fresh pineapple scraps!
Overall a busy but fun day visiting and working in the kitchen with my mom!
Please comment if you are interested in more details on any of the projects! I’ve got more videos on youtube and Pinterest pins on my favourite appliances and am continuing to learn how to edit and create enjoyable content 🙂 Thanks for reading my post!
From left to right starting at the back: Jar with tap is the start of black tea/apple tea kombucha, then scrap apple vinegar x 2, pineapple tea kombucha, apple cider vinegar with the fruit removed, hard apple peel cider. The front 3 jars are straight apple tea and a black tea for the kombucha jug(more…)